

Google Apps Script also known as Apps Script or sometimes Google Script, is a scripting language based on JavaScript and used within Google’s G Suite applications. Although it started life as a side project within Google Sheets, today it is used as a scripting language within all of the Google apps family including Google Sheets, Google Docs, and Google Slides as well as to build add-ons for deployment into the Google add-on store. Given the increasing popularity of Google’s G Suite apps, using Apps Script to automate and add functionality is becoming more and more valuable. In this how-to article we’ll show you how to load and parse historical weather data in Apps Script so that you can easily add weather functionality to any G Suite app or add-on.
Building an historical weather query
The first step in the process is to build an historical weather query, and the easiest way to get started with historical weather is to use the Visual Crossing Weather web-based query builder. You find a detailed description of the web interface under: https://www.visualcrossing.com/resources/documentation/weather-data/how-to-build-a-weather-dataset-for-download-bulk-import-or-scheduling/
you will find the API query string under the ‘</> API’ tab
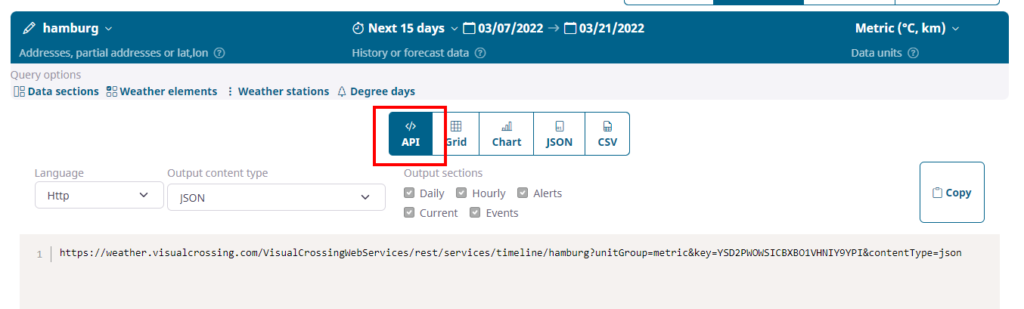
Simply click on the “Copy” button and the entire query will be loaded into your copy-and-paste buffer. In this example, our complete query URL looks like this.
https://weather.visualcrossing.com/VisualCrossingWebServices/rest/services/weatherdata/history?aggregateHours=24&combinationMethod=aggregate&startDateTime=2020-01-01T00%3A00%3A00&endDateTime=2020-01-01T00%3A00%3A00&collectStationContributions=false&maxStations=-1&maxDistance=-1&includeNormals=false&contentType=json&unitGroup=us&locationMode=single&key=<YOUR_API_KEY>&locations=Herndon%2C%20VAWriting our first Apps Script Weather function
Now we can set up a simple Apps Script function to load the data from the query that we just built. We’ll make it more complex later, but let’s start by simply fetching the data and printing the results. Below is the full code and we’ll explain the operation of its pieces below.
function fetchHistoricalWeather()
{
  // Fetch Visual Crossing Weather query
  var url = "https://weather.visualcrossing.com/VisualCrossingWebServices/rest/services/weatherdata/history?aggregateHours=24&combinationMethod=aggregate&startDateTime=2020-01-01T00%3A00%3A00&endDateTime=2020-01-01T00%3A00%3A00&collectStationContributions=false&maxStations=-1&maxDistance=-1&includeNormals=false&contentType=json&unitGroup=us&locationMode=single&key=<YOUR_API_KEY>&locations=Herndon%2C%20VA";
  var response = UrlFetchApp.fetch(url);

  // Parse the JSON reply
  var json = response.getContentText();
  var data = JSON.parse(json);

  // Get a few of the weather variables
  var hightemp = (data['location']['values'][0]['maxt']);
  var lowtemp = (data['location']['values'][0]['mint']);
  var avehumidity = (data['location']['values'][0]['humidity']);


  // Print the results
  Logger.log("Weather Results");
  Logger.log(" + High Temp: " + hightemp);
  Logger.log(" + Low Temp: " + lowtemp);
  Logger.log(" + Humidity: " + avehumidity);
}
The first part of our script sets the query URL into a variable named “url” and then uses UrlFetchApp.fetch() to retrieve the results. Once we have the results in our “response” variable, we can get the JSON text and parse it via JSON.parse(). Then we can look up individual values in the JSON and output them to the default logger. Of course, there are many more weather variables available than the ones shown in this example, and you can easily look them up in the same way as we do temperature and humidity above. We just limit the code sample for readability.
Tip – If you want to run this code immediately, you can use Google’s App Script test tool at http://script.google.com. Just point your browser to this site, log into your Google account, and paste in the code as a new project. Just make sure to paste in your Visual Crossing API key into the query URL in place of the placeholder <YOUR_API_KEY>. Using the Google’s App Script test tool, you can edit, run, and debug code in seconds. If you are new to App Script it is the easiest way to get started.
Expanding our Apps Script Weather lookup
Our initial App Script query is quite hardcoded. So we can make our example more interesting by making our query more dynamic. We can do so by building parts of our query URL in code instead of using a static string. One obvious element that should be made a parameter is the location. We can do that with a code adjustment that looks like this.
  var location = encodeURIComponent("Washington, DC, USA");

  var url = "https://weather.visualcrossing.com/VisualCrossingWebServices/rest/services/weatherdata/history?aggregateHours=24&combinationMethod=aggregate&startDateTime=2020-01-01T00%3A00%3A00&endDateTime=2020-01-01T00%3A00%3A00&collectStationContributions=false&maxStations=-1&maxDistance=-1&includeNormals=false&contentType=json&unitGroup=us&locationMode=single&key=<YOUR_API_KEY>&locations="+ location;
Note that we URL encode the location string so that it will be passed safely for the query. Then we just concatenate it into the query URL with the appropriate tag. We could instead used latitude and longitude values if they are available. In that case we would set the “locations” parameter to be “<latitude>,<longitude>”. Finally, we could also use multiple locations here instead of just one. To so do we would separate the locations with the pipe (‘|’) character.
It would also be useful to dynamically specify the query date. For the sake of an example, we might want to always query the weather conditions exactly one week before today. To do so, we would extend our code snippet above like this.
  var MILLIS_PER_DAY = 86400000;
  var now = new Date();
  var date = new Date(now.getTime() - (MILLIS_PER_DAY * 7));
  var dateString = Utilities.formatDate(date, 'America/New_York', 'yyyy-MM-dd') + "T00:00:00";
  var encodedDateString = encodeURIComponent(dateString);

  var location = encodeURIComponent("Washington, DC, USA");

  var url = "https://weather.visualcrossing.com/VisualCrossingWebServices/rest/services/weatherdata/history?aggregateHours=24&combinationMethod=aggregate&startDateTime=" + dateString + "&endDateTime=" + dateString + "&collectStationContributions=false&maxStations=-1&maxDistance=-1&includeNormals=false&contentType=json&unitGroup=us&locationMode=single&key=<YOUR_API_KEY>&locations="+ location;
Our code begins by setting up a constant for the number of milliseconds in one day. This is an important value because milliseconds is how App Script stores and manages date and time values. We then get the number of milliseconds since the epoch (1/1/1970 UTC) for our current date using the getTime() method. Simple math can give us the proper number of milliseconds for seven days before today so that App Scripts can make us a proper date object that represents one week ago. All that remains is for us to format the date properly for the API call and encode it as we did the location. Another possible enhancement would be to query a multiple-day date range by using a different date for the state and end times. This would give multiple days of weather history data with a single query and provided multiple rows in the result JSON.
Of course, this is just the beginning of how we can adjust the query URL. You can change unit type (US vs. metric), request hourly or sub-hourly weather data, and much more. For details on how to customize the API further, please see the Visual Crossing Weather API documentation.
Moving our weather query into G Suite Apps
One of the key powers of Google Apps Script is its ability to be embedded into G Suite Apps such as Google Sheets and Google Docs. For this reason, we’ll end this article by showing you some simple ways to move the weather query into your favorite Google apps.
In Google Sheets, for example, we might want to read the weather query date from a specific cell in the sheet. Luckily, this is easy with a code snippet such as this.
  var range = SpreadsheetApp.getActiveSheet().getRange('C8');
  var value = range.getValue();

  var dateString = Utilities.formatDate(value, 'America/New_York', 'yyyy-MM-dd') + "T00:00:00";
  var encodedDateString = encodeURIComponent(dateString);

  var url = "https://weather.visualcrossing.com/VisualCrossingWebServices/rest/services/weatherdata/history?aggregateHours=24&combinationMethod=aggregate&startDateTime=" + dateString + "&endDateTime=" + dateString + "&collectStationContributions=false&maxStations=-1&maxDistance=-1&includeNormals=false&contentType=json&unitGroup=us&locationMode=single&key=<YOUR_API_KEY>&locations=Herndon%2C%20VA";
At the top of this snippet we read the value of the cell ‘C8’ from the active sheet. We then use this cell value as a date to format and encode as a string for use in the query URL. This second part is exactly as we did earlier when working with dates above.
When running in a Google Sheet, we probably want to also write our weather results to specific cells in the sheet instead of dumping them to the log. Again this is easy with a slight modification to the output code at the end of our example script.
  // Get a few of the weather variables
  var hightemp = (data['location']['values'][0]['maxt']);
  var lowtemp = (data['location']['values'][0]['mint']);
  var avehumidity = (data['location']['values'][0]['humidity']);


  // Put the results into Google Sheets cells
  SpreadsheetApp.getActiveSheet().getRange('F8').setValue(hightemp);
  SpreadsheetApp.getActiveSheet().getRange('G8').setValue(lowtemp);
  SpreadsheetApp.getActiveSheet().getRange('H8').setValue(avehumidity);
This snippet will populate our three example values into cells in the 8th row of the active sheet. This would work well in a single sheet with a fixed layout. And with some additional work our code could also support dynamic sheet layouts and sheets with multiple pages. For more details, please see the Google Sheets API documentation.
Finally, we might want to embed our weather query into Google Docs instead and look up historic weather based on a location name currently selected by the user. We could do that with a snippet like this.
  var encodedLocation = encodeURIComponent("_auto_");

  var selection = DocumentApp.getActiveDocument().getSelection();
  if(selection)
  {
    var elements = selection.getRangeElements();
    if(elements.length > 0)
    {
      var element = elements[0];
      var location = element.asText().getText()
      encodedLocation = encodeURIComponent(location);
    }
  }

  var url = "https://weather.visualcrossing.com/VisualCrossingWebServices/rest/services/weatherdata/history?aggregateHours=24&combinationMethod=aggregate&startDateTime=2020-01-01T00%3A00%3A00&endDateTime=2020-01-01T00%3A00%3A00&collectStationContributions=false&maxStations=-1&maxDistance=-1&includeNormals=false&contentType=json&unitGroup=us&locationMode=single&key=<YOUR_API_KEY>&locations="+ encodedLocation;
This code is a little more complex then before but easy to understand. It sets a default for the “encodedLocation” variable at the very top, and then probes the currently active Google Doc for its selection. If if finds a selection, it replaces the default location with that selection text. (Note that this simple code doesn’t deal with multiple selections, but real world code may want to do so.) We then add the location string into the query URL just as we did before.
There is one additional trick in this code that is worth mentioning. For the default location, we use the string “_auto_”. This is a special placeholder that tells the weather server to look up weather data for the user’s current location (based on their IP). Setting the default location to “_auto_” in this way allows the user to get data for an interesting and useful location even if they have not made a select within their Google Doc. Of course, in the real world your code may want to give an error or simply ignore the request. Also, instead of hard coding a query date, you may want to combine the dynamic date code in the earlier example with this code to give the user weather based on the current date.
In Summary
There are many different ways to query and use weather data within Google Apps Script and G Suite apps. This article has armed you with the tools to do so but has only provided an overview. To learn more, please review the Visual Crossing Weather API documentation, the Google App Script documentation, and the API docs for any specific G Suite apps (such as Google Sheets or Google Docs) into which your code will be embedded. This powerful combination of technologies allows you to make useful weather scripts for all types of use cases and users.
If you would like to talk more about using weather within Google Apps Script or about weather data in general, please comment below or reach out to us at support@visualcrossing.com